Real Time Monitoring
This type of report (also known as “instant result report”) is used to instantly display face recognition events for the purpose of immediately verifying a person’s identity for possible applications such as: security guards, concierges, or service desks. Faces detected from these events can also be registered into the FaceMatch Edge face database. Provides the latest 100 face recognition records.
 A.【Filtering】 ⇒ Click the (
![]() ) 'filter' to extend a search menu on the right side. Users can filter recognition events based on person tags, video source, or recognition results.
) 'filter' to extend a search menu on the right side. Users can filter recognition events based on person tags, video source, or recognition results.
B.【Real-time Recognition Event】 This field displays the real-time facial recognition events.

- a. Snapshot: The left side shows a real-time snapshot, which was captured by the video source. The right side shows a picture of the registered profile and the recognition match rate.
- b. Recognition Result: Shows the name and person tag. However, if the person is a stranger, it displays 'Unknown'.
- c. Time & Video Source: The time when the recognition event occurred and the video source that captured the face.
- d. Insert Person: If this person is unknown, users can click the
 'Insert Person'to add them to a new profile. However, if the
  'Insert Person' is grayed out, it means that the snapshot quality is not good enough for enrollment, even if the person has never been enrolled before.
History
This type of report aka 'historical reports' is used to display past face recognition events, for the purposes of providing a reliable face recognition events access log.

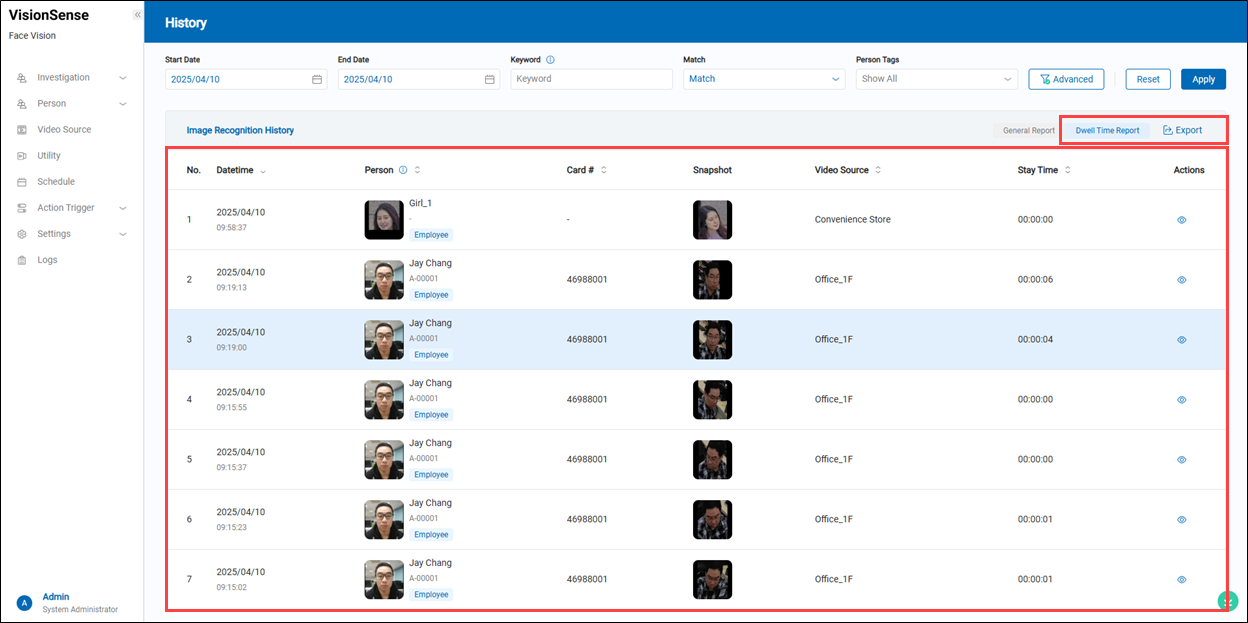
A.【Filtering】 ⇒ Use the display filters to narrow down results by name, employee ID, video source, person tags, and recognition result, along with a date range. You can also use ![]() advanced search to further refine results by mask status or card number.
advanced search to further refine results by mask status or card number.
B.【Report Type & Export】 ⇒ Provides two types of reports and exports face recognition events.
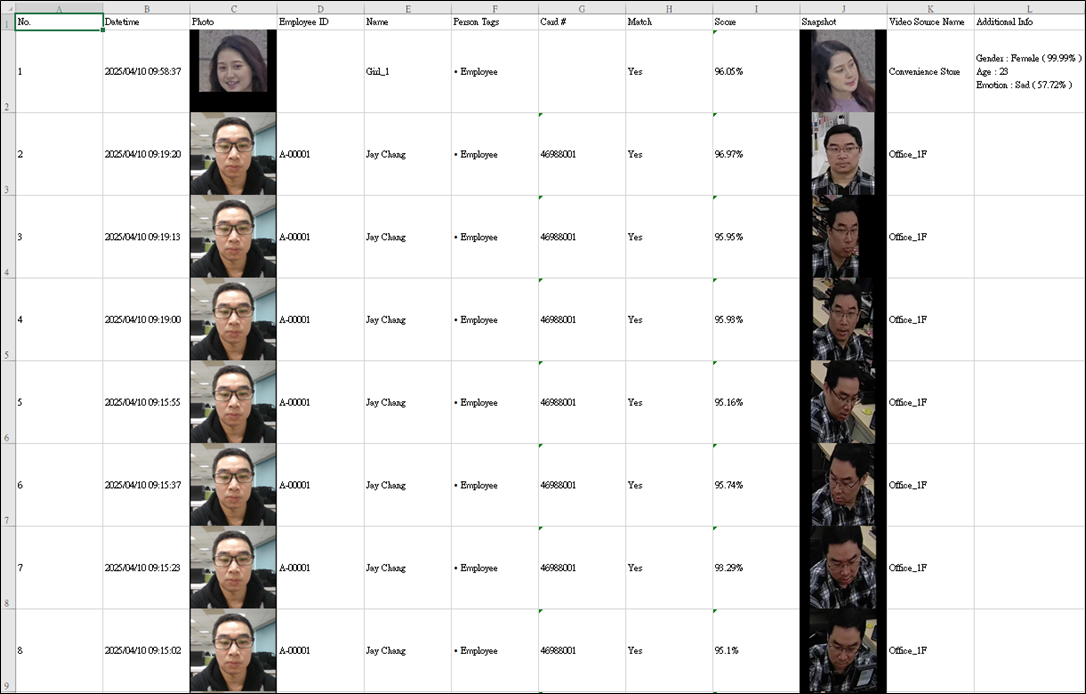
【General Report】 Displays a standard recognition history report, including all facial recognition records.
- Datetimne: The date and time when the event occurred.
- Person: The recognized person’s name or tag (e.g., Employee, VIP).
- Card #: The person's card number (if available).
- Snapshot: The snapshot captured during the recognition event.
- FR Result: Displays the facial recognition outcome, including: Match / Not Match; Similarity Rate (Percentage of similarity)
- Video Source: Indicates the camera location where the image was captured (e.g., "Convenience Store").
- Additional Info: The face snapshot displays basic information including gender, age, and emotion analysis. To view more detailed facial analysis, hover your mouse over the 'Pie Chart'. Additional facial expression details will appear.
- Action: Hover over the '+', it will extend the function menu. Note: If the '+' is grayed out, it means the quality of this snapshot is not sufficient for enrollment.
- Add Person: Allows users to click 'Add Person' to add this snapshot to a new profile.
- Insert Existing People: Allows users to click 'Insert Existing People' to add this snapshot to an existing profile.
- Export: Click the
 'Export' to export all face recognition events, including the captured face snapshots.
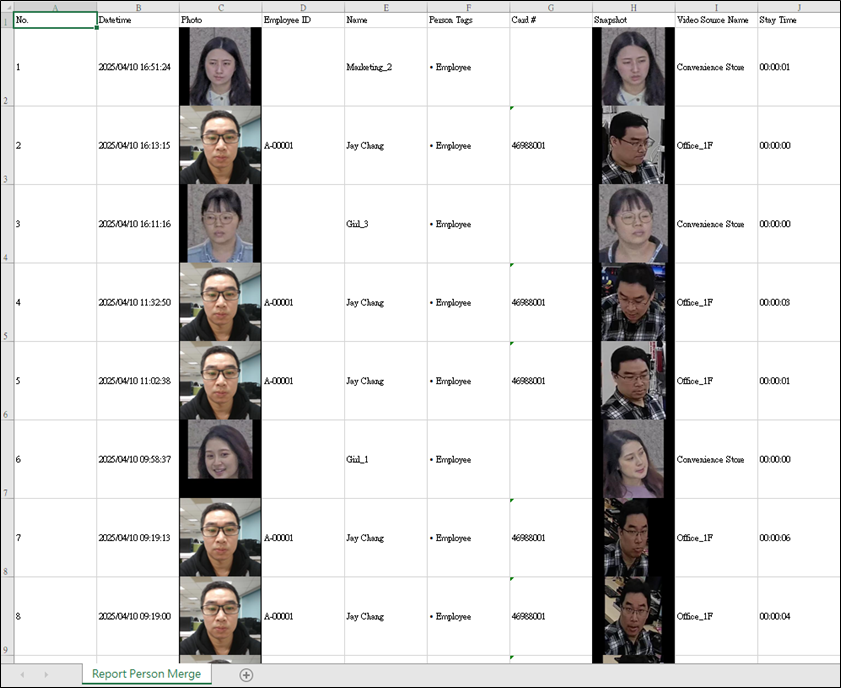
【Dwell Time Report】
Displays a dwell time report, analyzing how long a person stays in a specific location.
-
Datetimne: The date and time when the event occurred.
-
Person: The recognized person’s name or tag (e.g., Employee, VIP).
-
Card #: The person's card number (if available).
-
Snapshot: The snapshot captured during the recognition event.
-
Video Source: Indicates the camera location where the image was captured (e.g., "Convenience Store").
-
Stay Time: Displays the continuous dwell time of the person in front of the same camera.
-
Action: Click the
 'View Details' to see more aboult this recognition event.
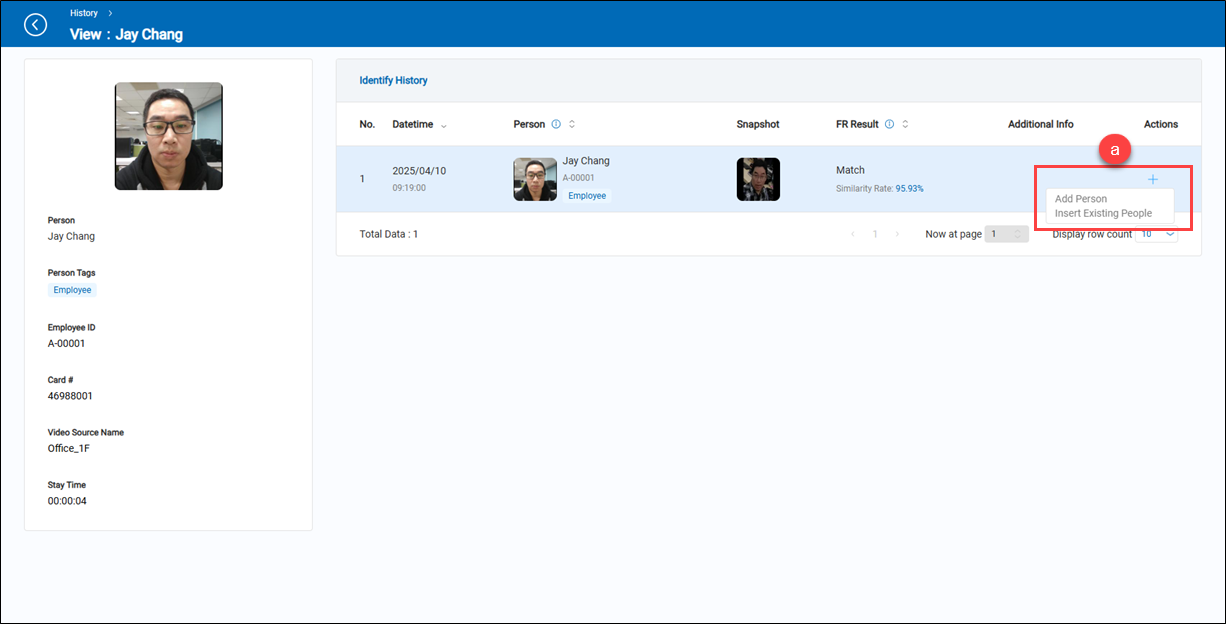 a.【Action】 Hover over the '+', it will extend the function menu.
- Add Person: Allows users to click 'Add Person' to add this snapshot to a new profile.
- Insert Existing People: Allows users to click 'Insert Existing People' to add this snapshot to an existing profile.
-
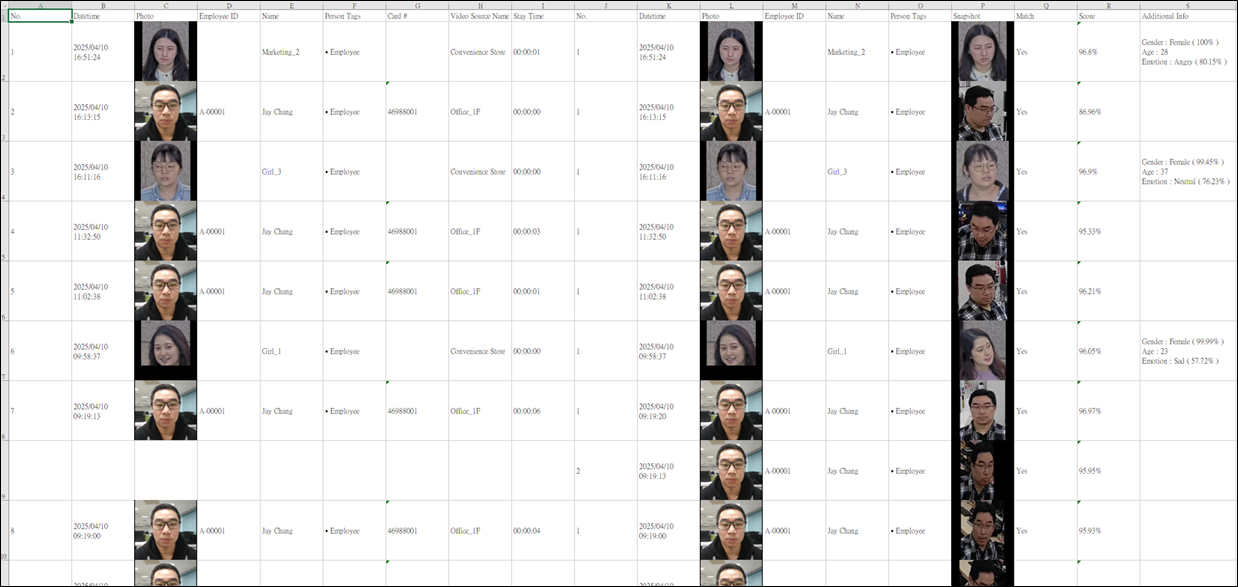
Export: Hover over the
'Export' to extend the function menu, then click it to export face recognition events to an Excel file.-
Details Information Included
-
No Details Information Available
-
Trigger Log
This type of report (also known as a ‘history report of Action Trigger’) is used to display past records of action triggered by face recognition events.
 A.【Filtering】 ⇒ Use the display filters to narrow down results by name, employee ID, action name, utility name, video source, and card number, along with a date range. You can also use
 ![]() advanced search to further refine results by specifying a start time and end time.
advanced search to further refine results by specifying a start time and end time.
B.【Historical Records】 ⇒ Display the historical trigger action event records.顯示歷史的觸發動作事件記錄。
- Datetime: Displays the time when the event occurred.
- Action Name: Displays the name of the triggered action.
- Action Type: Displays the type of video source used for this triggered event, such as IP Camera or Webcam.
- Video Source: Displays the video source used for this triggered event.
- Rule: Displays the rule conditions that triggered this event.
- Additional Condition: Displays the gender-based condition applied to this triggered event.
- Utility: Displays the utility used in this triggered action event.
C.【Export】 ⇒ Click the 'Export' o export the historical data of the trigger log into an Excel file.