Video Source Management
After adding an IP camera from the Settings page, the newly added camera will appear in the Video Source list. On this configuration page, users can set up object detection by defining detection regions, selecting an AI model, and configuring the detection threshold.
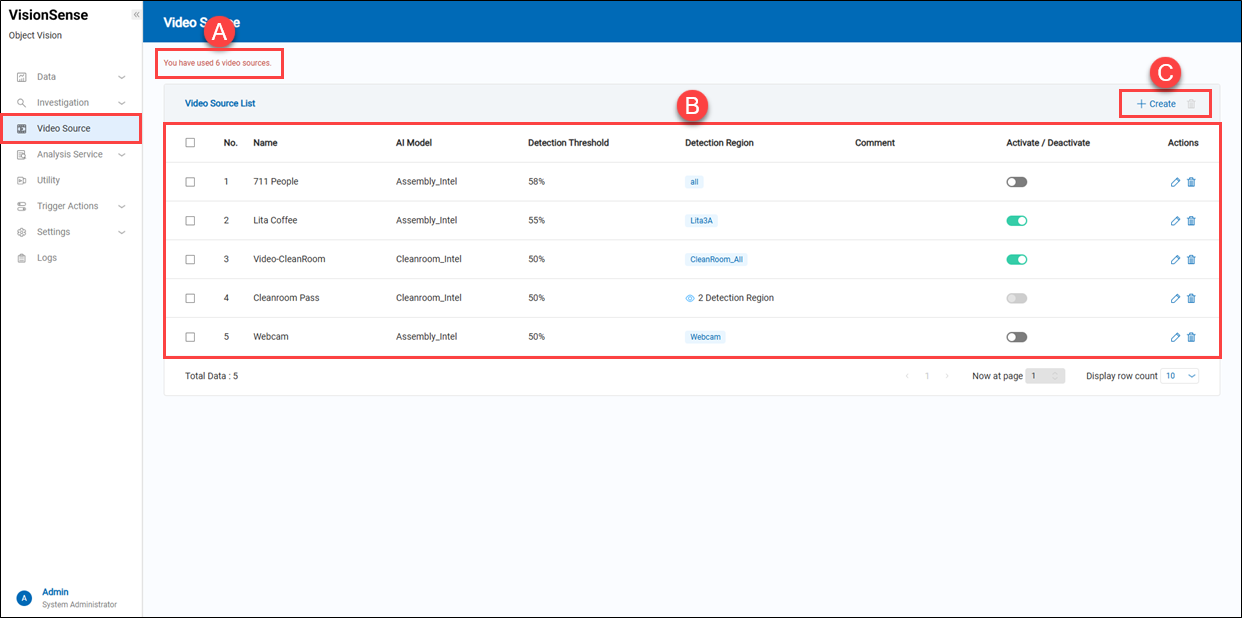 A.【Number of Licenses】 ⇒ The tip displays how many cameras can be added and how many cameras are used.
B.【Video Source List】
A.【Number of Licenses】 ⇒ The tip displays how many cameras can be added and how many cameras are used.
B.【Video Source List】
- Name: It displays the name of the added video sources.
- AI Model: Indicates the AI analysis model assigned to this video source.
- Detection Threshold: Detection Threshold is a setting used to adjust the system's sensitivity in determining whether a target, such as a person or an object, has been detected. This threshold is typically represented as a numerical value, ranging from 0 to 100 (or other appropriate units), and is used to control the confidence level of AI or video analysis systems in detection results.
- Detection Region: It indicates the number of detection regions defined for this video source. Users can hover over
 'view'. to see the details.
 - Comment: Options. Users can input some descriptions to describe the detection purpose.
- Activate/Deactivate: Users can activate or deactivate this video source profile.
- Actions: Click the
 'Edit' to enter the edit page or click the
  'Delete' to delete the assigned item.
C.【+ Create/Delete】 ⇒ Users can click ![]() '+ Create' to add a video source and click
'+ Create' to add a video source and click ![]() 'Delete' to remove multiple video sources at a time.
'Delete' to remove multiple video sources at a time.
a.【Create Video Source】 ⇒ Video Source Information
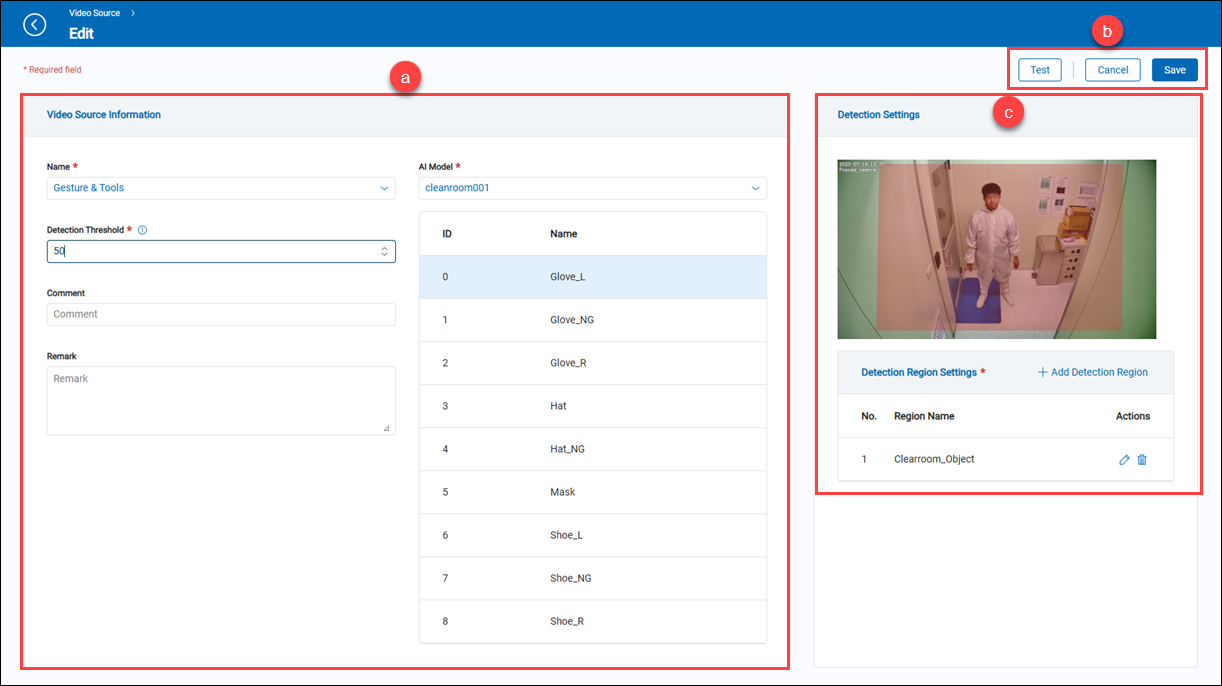
- Name: It is an option list that will display the added IP cameras from the 'Video Source' on the 'Settings' function page. Select a video source to be used for object detection.
- AI Model: Select the AI model to analyze this video source. Different models are capable of detecting different types of objects.
- Detection Threshold: Set the sensitivity of the AI detection. A higher value indicates a stricter confidence requirement for detection.
- Comment: (optional) Users can input any string for notes.
- Reamrk: (optional) Users can input any string for notes.
b.【Operation】 ⇒ To save or cancel those settings. Once users have done these settings, they can click the ![]() 'Test' to get a live snapshot from the video source. If successful, the live snapshot will be displayed in the snapshot field.
'Test' to get a live snapshot from the video source. If successful, the live snapshot will be displayed in the snapshot field.
c.【Detection Settings】 ⇒ Live snapshot field allows users to add detection region for the detecting objects. See below '+ Add Detection Region.
- Region Name: It displays the name of the added detection region.
- Actions: Users can edit and delete the added detection region.
【+ Add Detection Region】
- Unit Name: A user-friendly name to identify this detection region.
- Reset: Clicking 'Reset' will erase the added detection region(s) from the snapshot.
- Confirm/Cancel: Click either the 'Confirm' to apply the settings or the 'Cancel' to exit this page.
【How to add Detection Region】
Draw a quadrilateral on the snapshot. When the fourth point is placed, the system will automatically complete the shape.
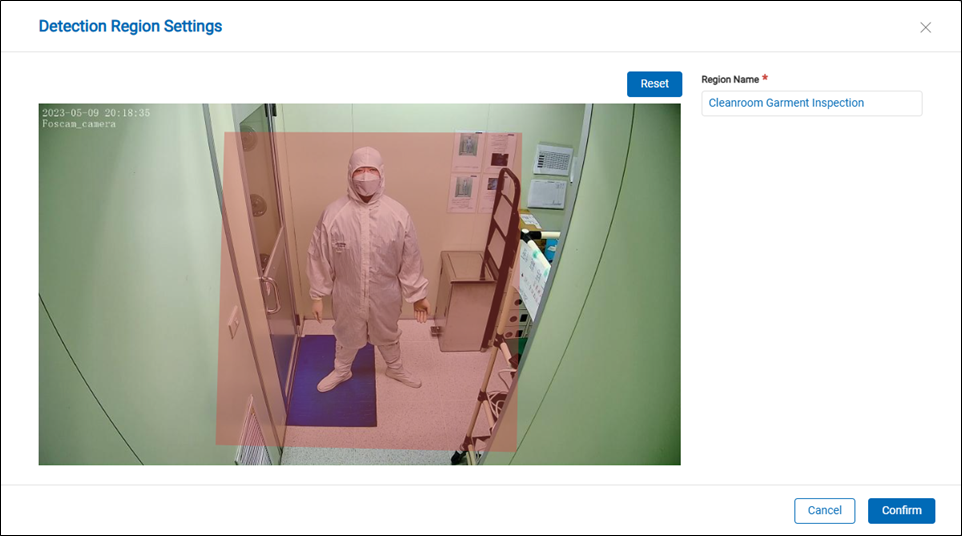
> Remark Up to three detection regions can be added in one video source.